Scratching the Itch on the Cardigan River

One of the very few problems with doing archaeological work on Prince Edward Island is that for a good 5-6 months of the year, you have to spend it indoors thanks to this terrible thing called Winter.  In Canada, it’s a time when snow flies and temperatures plummet (to people living in equatorial or sub-equatorial locales:  Yeah, I know, you guys have this season as well.  But this is the real Winter, so spare me your horror stories of “frigid” 20-degree Celsius days/nights).  Of course, Santa Claus pays a visit during this time, but that’s about the only positive thing I can think of.  Anyhow, let’s get this thing back on topic.

I suppose in a way it’s probably good for us to have to spend some time inside, or else we’d never get anything done in the way of post-excavation processing, research, and report writing.  But when you turn that corner in April and things begin to warm up a bit, you get this itch, a really annoying one, and the only way to scratch it is to hit the field.  This year, we scratched that itch with time spent down at the river – the Cardigan River, to be precise.

For those of you unfamiliar with the geography of Prince Edward Island, the Cardigan River is one of three major (Canadian heritage) waterways that form the Three Rivers, along with the Montague and Brudenell rivers.  These tidal estuaries have played a significant role in the history of eastern Prince Edward Island, beginning with the first Aboriginal peoples thousands of years ago and continuing into today.

Satellite image of Prince Edward Island with the Three Rivers system circled.

Satellite image of Prince Edward Island with the Three Rivers system circled.

Close(r)-up view of the Three Rivers.

Close(r)-up view of the Three Rivers.

Because of the importance of these rivers to Island history, we decided that it might not be a bad idea to begin a systematic survey to assess their archaeological potential.  Given the size of the rivers, however, a project like this is a massive undertaking, which we knew.  But if there’s one thing we’re used to, it’s big projects (*cough* PAV *cough*).

Remember that itch I was talking about?  Well, we had it real bad back in April.  It was so bad, in fact, that on April 23 we threw caution to a brisk northeasterly wind and hit the open road for Georgetown, 10-degree Celsius reading on the thermostat be damned.  The sun was shining as we sped along the Trans Canada in our red Dodge Caravan rental, and morale was surging.  All hail being in the field!

Anyway, we had decided on a jumping-off point at the end of the Earl Power Road, on the left just before you enter Georgetown proper.  I’ll admit, it may seem like an arbitrary place to begin a survey; however, we had been tipped off to an arrowhead having been found in the vicinity, and so we thought that that would be a good place to kick things off. After a quick bite to eat, the six of us (Dr. Helen Kristmanson, Meghan Ferris, Dawne Knockwood, Smantha MacKinnon, Alicia Compton , and myself) piled out of the van, artefact bags in hand, and made our way down to the shore.  We headed ENE towards the mouth of the river and straight into a relentless wind that chilled us to the core for the nearly three hours that we surveyed.  I won’t lie, it was rather brutal, and I’ll admit my snotsicles were pretty atrocious by the end. (FYI, “snotsicles” are “snot icicles”, an unfortunate reality of the cold Canadian climate.)  Anyway, here’s a Google Earth snapshot of our travels:

Our travels on April 23.  The arrows indicate direction, obviously.  I did them up in Paint, which is why they look so childish.

Our travels on April 23. The arrows indicate direction, obviously. I did them up in Paint, which is why they look so childish.

As you can see, we started out by walking the beach along the bank, and didn’t go all that far before turning back and investigating that largish spit of land you see above, essentially a big, flat sand dune.  Along the way, we encountered quite a bit of recent detritus, but also found numerous historic artefacts such as ceramic sherds, glass, and the odd chunk of metal here and there, probably associated with these residents shown in Meacham’s 1880 Atlas of Prince Edward Island:

Capture

Unfortunately, nothing Aboriginal was found, despite our insider information.

Entirely frozen, we finished off the day by putting in at the nearest Tim Hortons (coffee shop) in Montague in an attempt to stave off hypothermia, and decided to take stock of our artefacts and write up some field notes.  We drew quite a few furtive and sideways glances, so something tells me that people in deep discussion with Ziploc bags full of odds and ends spread out over two tables and poring over maps and aerial photos isn’t a very common sight at that establishment.

Well, that was the first day in the field for 2013, and also the first day of our survey of the Three Rivers.  Despite good intentions, we were unable to continue with that particular survey work because of other commitments, but it is definitely a project that we will be resuming in the future…hopefully when it’s warmer.

And now for a photo recap.

See you in the next post!
Good Things Come in Small Sizes

Image

I’d be “lion” if I said that I drew this myself.

The old saying “size doesn’t matter” couldn’t be more true when it comes to the artefacts excavated from an archaeological site.  Thanks to Hollywood and romantic notions of archaeology, people in general are under the impression that bigger is always better.  But while large artefacts might seem like they’re more important to the overall understanding of a site – and depending on what they are, they very well could be – the small stuff often seems to go unnoticed and under-appreciated in the grand scheme of things.  I suppose it makes sense in a way, given the fashion in which the human brain is wired; however, if you’ll recall your Aesop, it was the mouse that rescued the rough and tumble lion from the net.  And the lion was pretty dang grateful for it.

You’re probably wondering where I’m going with this.  Well, this time last year I came to learn just how valuable teeny tiny artefacts can be in the interpretation of a site, and how much information you can actually extract from them if you’re willing to give them a chance.

If there were two artefact varieties that characterized our final season at Pointe-aux-Vieux in 2011, they were faunal and lead shot, both of which were uncovered in (exceptional) abundance from an uber-organic patch of soil first exposed in 2010.  Whether we were finding them in situ or in the countless bags of soil we waterscreened, there just didn’t seem to be any end to them.  It’s almost as if everyone one that we found spawned about ten more.  Anyway, following what I can only assume was a hectic fall/winter/spring of cataloging thousands of artefacts (since I managed to escape that task), the next step was to divvy up the different categories of artefacts and compile an analysis for the site report.  That’s how I ended up dealing with everything arms-related (eg. Gunflints), including a few thousand pieces of lead shot.

I was going to say that I got “stuck” with everything arms-related, but I was only too happy to have that be the focus of my analysis.  The study of weapons, especially firearms, is a big passion of mine, so it was a natural fit; however, I really didn’t have any experience with analyzing lead shot, and had to spend quite a bit of time reading up on it.  I have to say, it’s fascinating stuff, and my new best friend in the world of artefacts.  It sounds crazy, but it’s true.

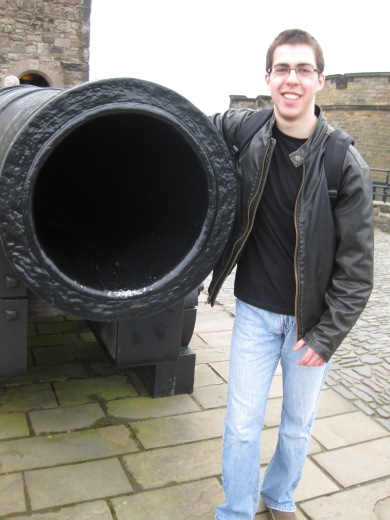
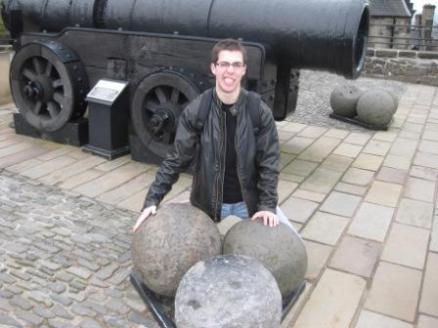
The thing about lead shot, however, is that it is a term that encompasses literally anything made of lead that is fired out of a gun barrel, ranging anywhere in size from a diameter of less than 1mm to a cannon ball fit for Mons Meg.

Image

Me ‘n Mons Meg (Edinburgh Castle – 2012)

Image

Lead shot fit for Mons Meg (Edinburgh Castle – 2012)

The lead shot I have been asked to analyze is the really small stuff, sometimes referred to as “buckshot” or “swanshot” or “birdshot”.  When you think projectiles, it certainly isn’t the first variety that comes to mind, unless you’ve grown up with BB guns.  Many people don’t think of projectiles being much smaller than the standard .69 cal musket ball, but they do exist, and they have a fascinating history to boot; however, if I get into that topic we’d be here all day, so to save on time, here’s the skinny:

Pre-1665:  Firearms (and their ammunition) have been continually evolving since the advent of the hand-held cannon in the 14th century, and are becoming increasingly popular on the battlefield.  As time has gone on, gun bores have become smaller, as has the ammunition.  The oldest variety of the small shot as we know it seems to have been made by cutting lead into small cubes, and then tumbling them in a barrel to (attempt to) get a more rounded shape.

1665:  Prince Rupert (yes, the Prince Rupert) devises a new and improved method for making small shot.  His idea?  Pour molten lead through a sieve, letting it fall into a container of cooling water.  Thanks to gravity (something they wouldn’t realize until after it was “discovered”), much more rounded shot was now able to be produced.  This process gave rise to the term “Rupert” shot.

1782:  William Watts, of Bristol, decides that he likes “Rupert’s” method.  He likes it so much, in fact, that he decides to take it to new heights – quite literally.  Realizing that the more time the shot is in freefall, the more spherical it will become, he builds the first shot tower, and thus is born “drop” shot.  Prince Rupert probably would have sued him for copyright infringement if such a thing existed at the time – and if Prince Rupert had still been alive, of course.

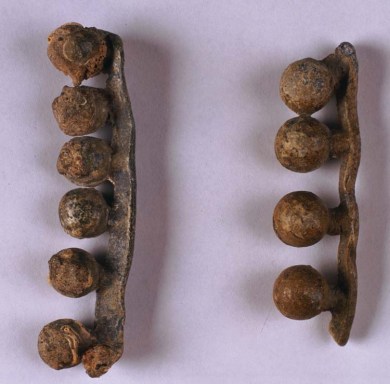
1665 and 1782 are really the key dates in the history of small shot.  In fact, not much has changed in the manufacturing process since 1782, and shot towers are still very much in use today.  Contemporary with “drop” shot was another method (or two depending on how you look at it): moulds.  If this was your method of choice, then you had two options.  You could either pour molten lead into a gang mould, which would make “stem” shot, so called because of the stem created by the manufacturing process.

Image

This isn’t the “stem” shot recovered from PAV. I got it from the Internets.

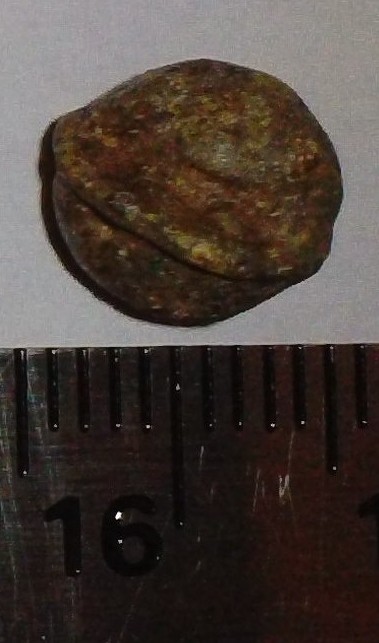
Or, you could use a two-part mould that would leave your shot with a seam around its circumference, and thus referred to as “seam” shot.

On the other hand, here's an example of actual "seam" shot recovered from PAV.

On the other hand, here’s an example of actual “seam” shot recovered from PAV.

As with shot towers, moulds are likewise still in use.

Alright, time to flash forward to the present.

Although our work at Pointe-aux-Vieux has finished, we’re still working on fine-tuning our artefact analysis for the final report, to be completed (hopefully) some time before 2013 comes to a close.  After last summer’s work with the lead shot from 2011, I thought that would be it; however, last October Claude, our most intrepid of volunteers who continually monitors the site, discovered on the beach directly in front of the site an enormous cluster of small shot, somewhere in the vicinity of five thousand pieces.  Because of the large amount found essentially in one spot (even if it wasn’t within the excavation proper), it was decided that they warranted analysis.  That’s where I came in, and where I’m at right now as I type this.

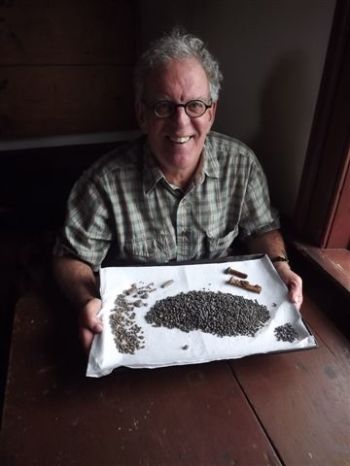
Now, I know what you’re thinking:  Five thousand pieces of lead shot?  What the heck does that look like?!  And how would you ever go about getting information from it?  Well, to answer your first question, here’s a picture of Claude with the lead shot:

Image

Lead shot, anyone?

And as for your second question, one piece of shot at a time.  You might think it painstaking, but as Marcus Aurelius was fond of saying:  Σπευδε βραδεως (that one’s for you, Shalen).

When I first found out that I would be taking on this analysis, I came up with a methodology to keep things organized.  A quick examination helped to determine the presence of at least three varieties of shot (“drop” shot, “stem” shot, and “seam” shot), so I decided that I would break the collection up according to type.  And because I’m a masochist, I then thought that it would be even better if they could be further divided according to size, so on top of the three categories of type, I added 7 for size:

Diameter of:

<1mm

>1mm – 2mm

>2mm – 3mm

>3mm – 4mm

>4mm – 5mm

>5mm – 6mm

>6mm

If you’re keeping track of the math, we’re sitting at

3 (shot varieties) x 7 (size varieties per shot variety) = 21 different categories

(I have absolutely no idea if this is how it’s done by professionals.  All I know is that I’m anal about organization.)

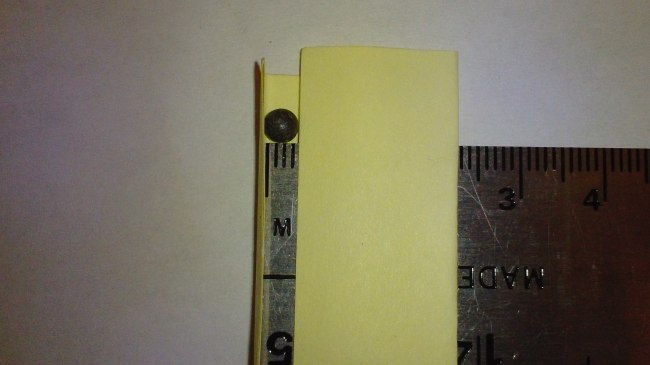
When I started back in April, I decided to tackle division according to size first, given that it seemed to present a more daunting challenge than division according to type.  And I was right.  In fact, it was only at the end of last week that I was officially able to start on phase two (type).  While I’ve had to split my time between other projects along with this analysis, individually sizing five thousand pieces of shot takes some time, as you might imagine.  Especially when you’re using a homemade set of calipers:

Image

Post-It Notes to the rescue!

(Note:  We aren’t so impoverished that we can’t afford actual calipers.  It’s just that I didn’t have them at my disposal at the outset, and by the time I got my hands on them, I had become quite attached to my Frankenstein creation.)

Anyway, like I said, I’ve recently moved on to the second phase, and dividing by type is proving far easier than size.  I still have a ways to go yet, and with our field season just around the corner, I don’t think it likely that I’ll be working on my analysis much in the next few weeks.  I also don’t find it likely that you’ve appreciated having to read all of this, so I’ll finish this post by captioning a few pictures of my work with shot.  I promise my next entry won’t be as long.

Sincerely,

Isaac

a.k.a “General Danger”

a.k.a the guy from the 2011 pics with the bucket hat and God-awful tan lines.